Saving a Preset
There are two ways to save a preset. You can either save a preset from the Edit Presets page, or you can save a preset from the pedigree page in the settings modal. You can have up to three personalized presets. "Standard" and "Standard Print" presets cannot be edited or deleted.
Using the Edit Presets Page
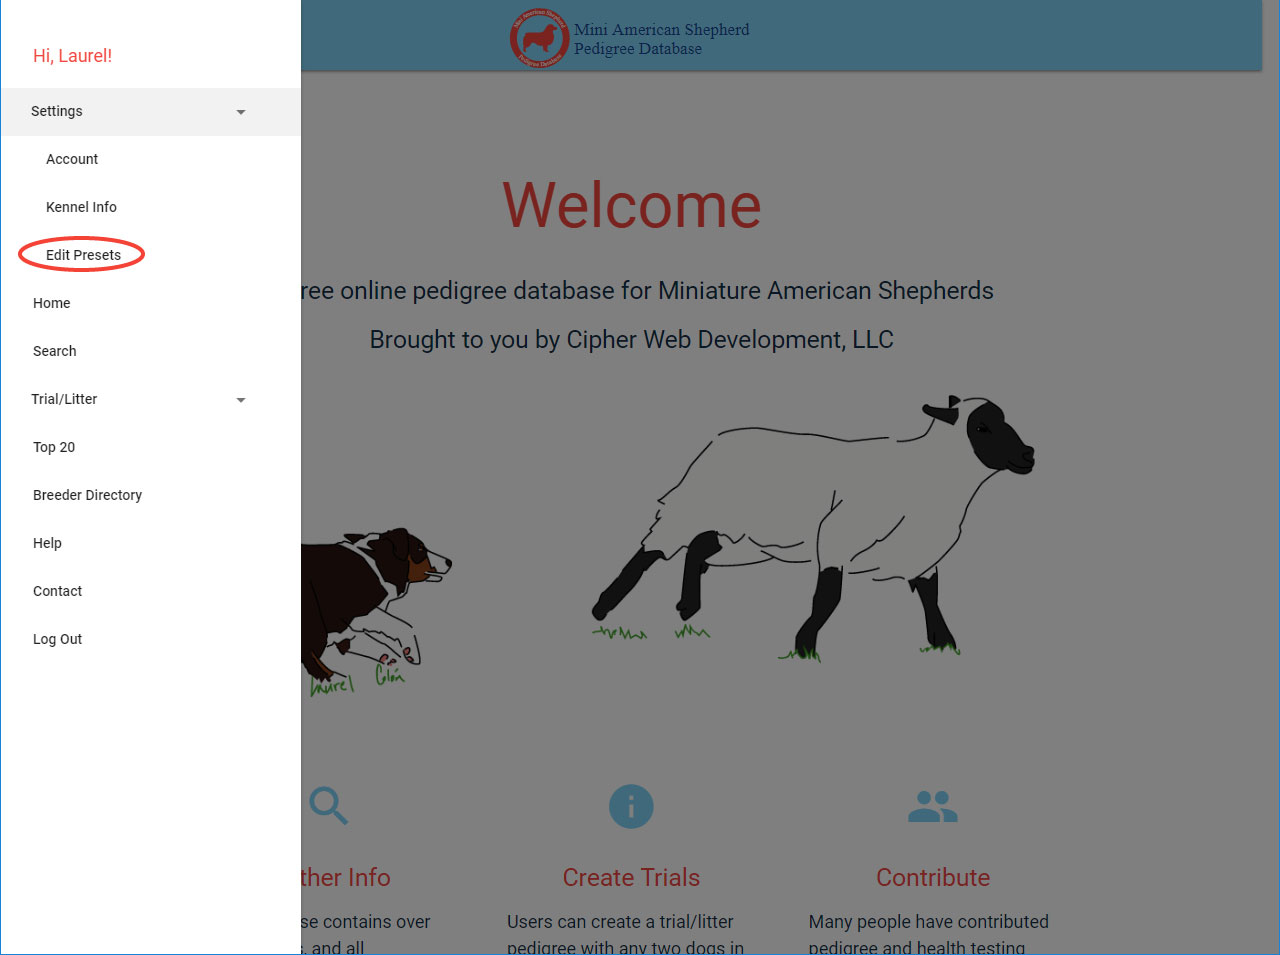
1. First, navigate to the Edit Presets page.
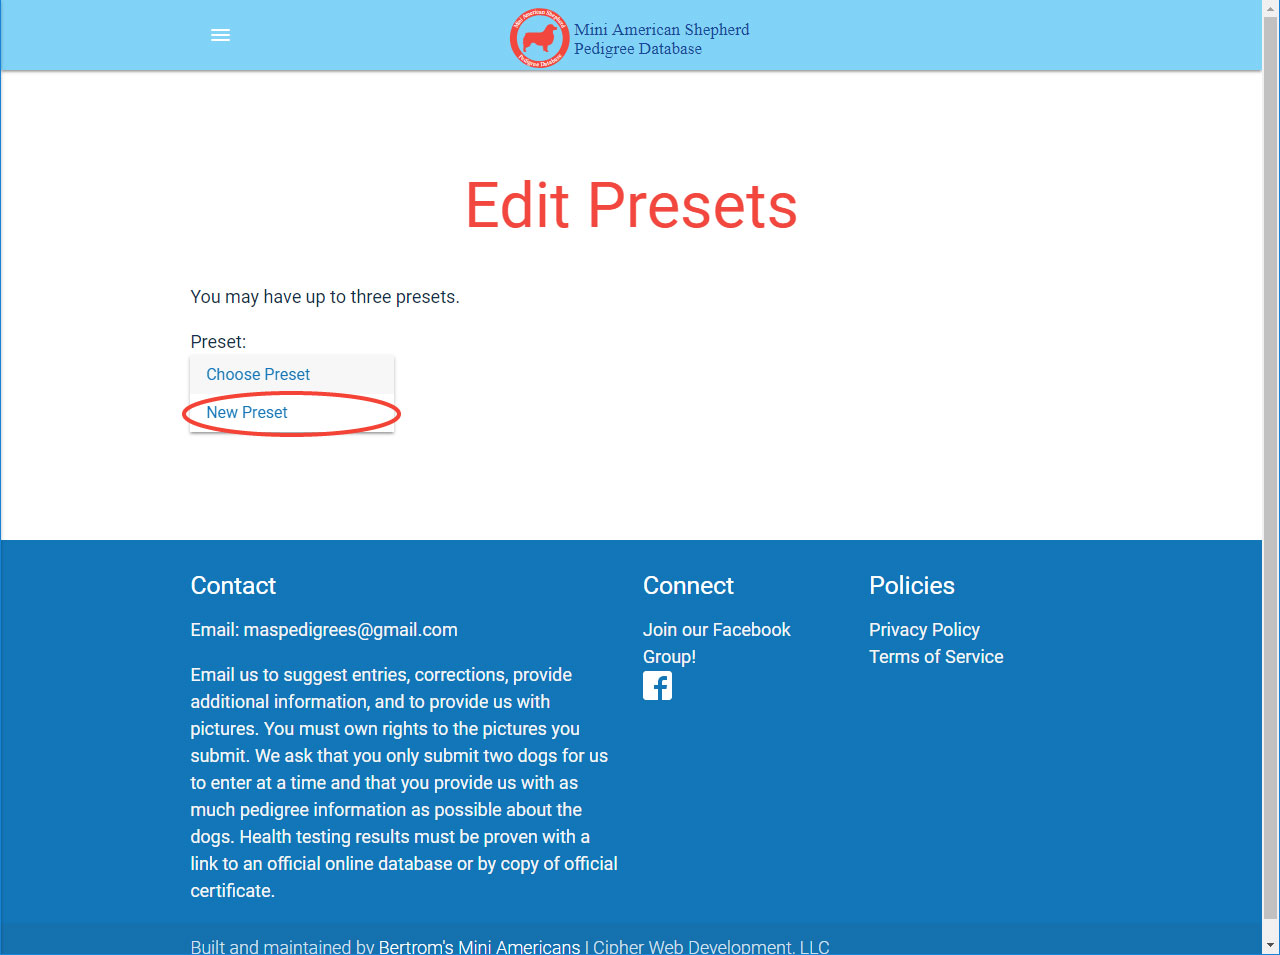
2. On the Edit Presets page, there is a dropdown labeled "Choose Preset". Click on it, and select "New Preset". This will only appear if you have fewer than three saved presets. "Standard" and "Standard Print" cannot be edited or deleted, so they do not display on this page and do not count toward your three presets.
3. Give your preset a unique name and select which options you'd like to be visible on a pedigree when this preset is selected.

4. Success! Your new preset has been saved, and it can now be used on stored and trial pedigrees.

Using the Pedigree Page Modal
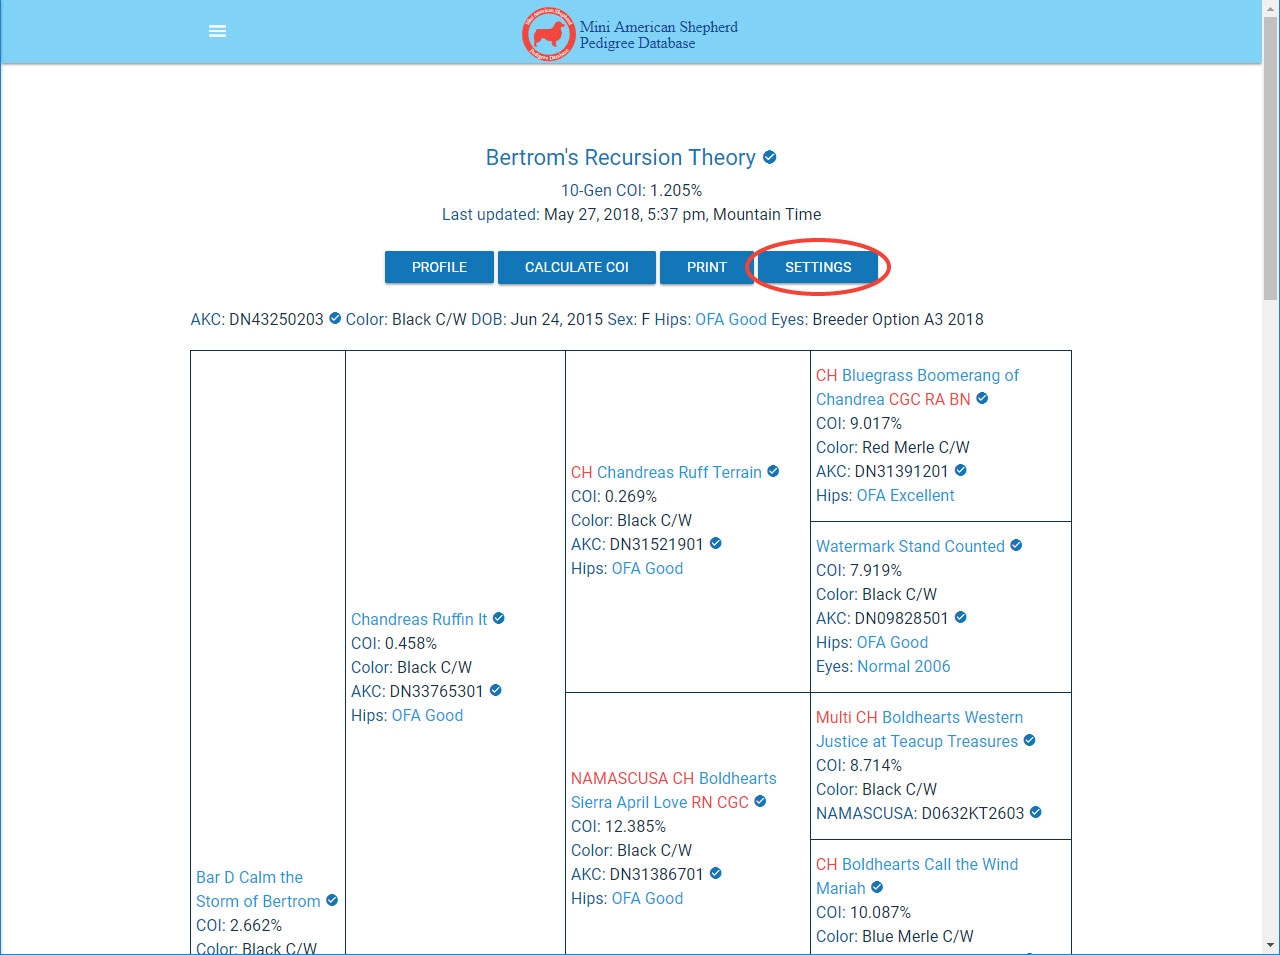
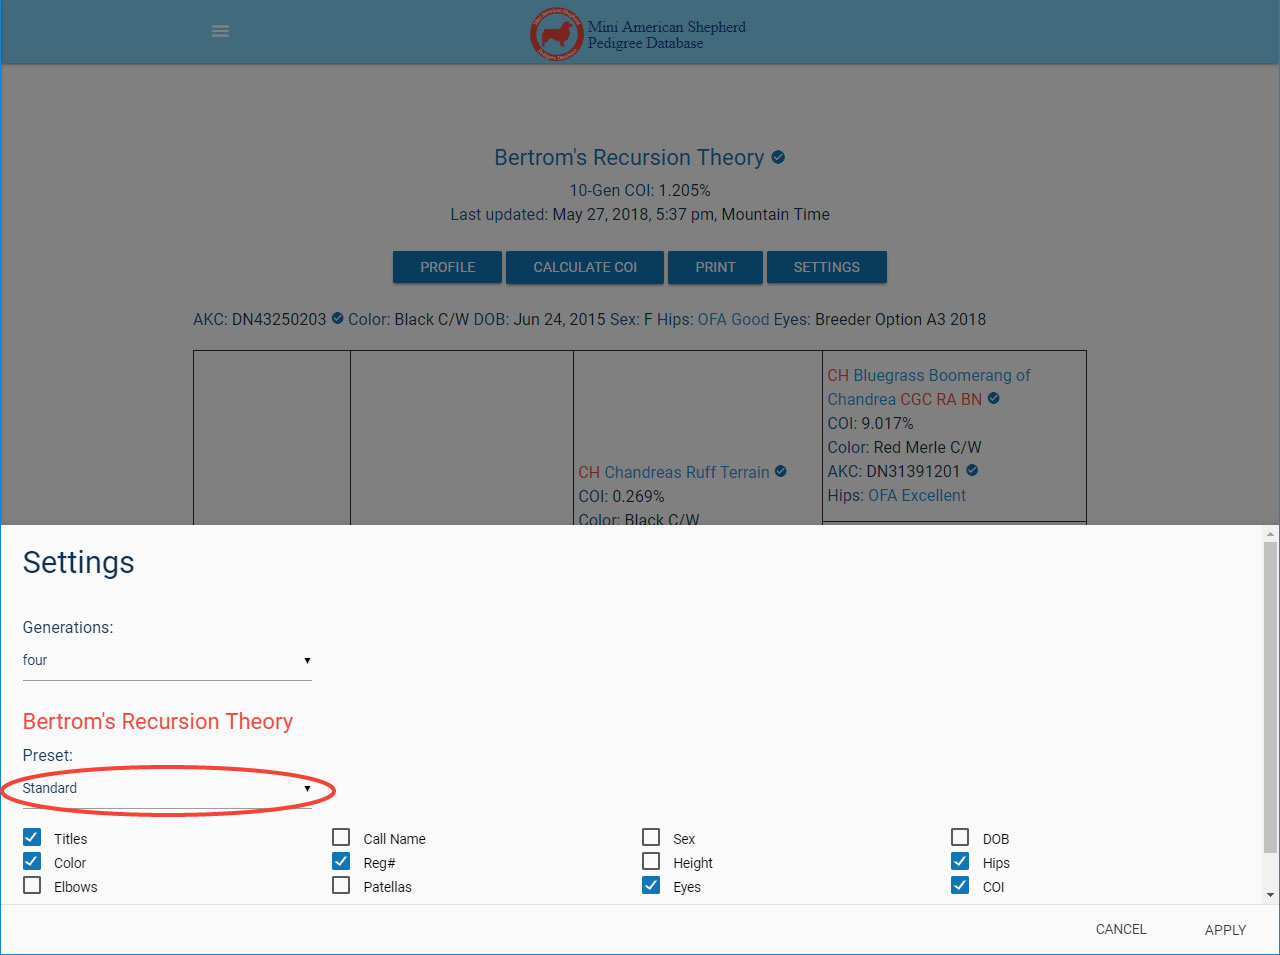
1. From the Pedigree page, click on the button labeled "SETTINGS".
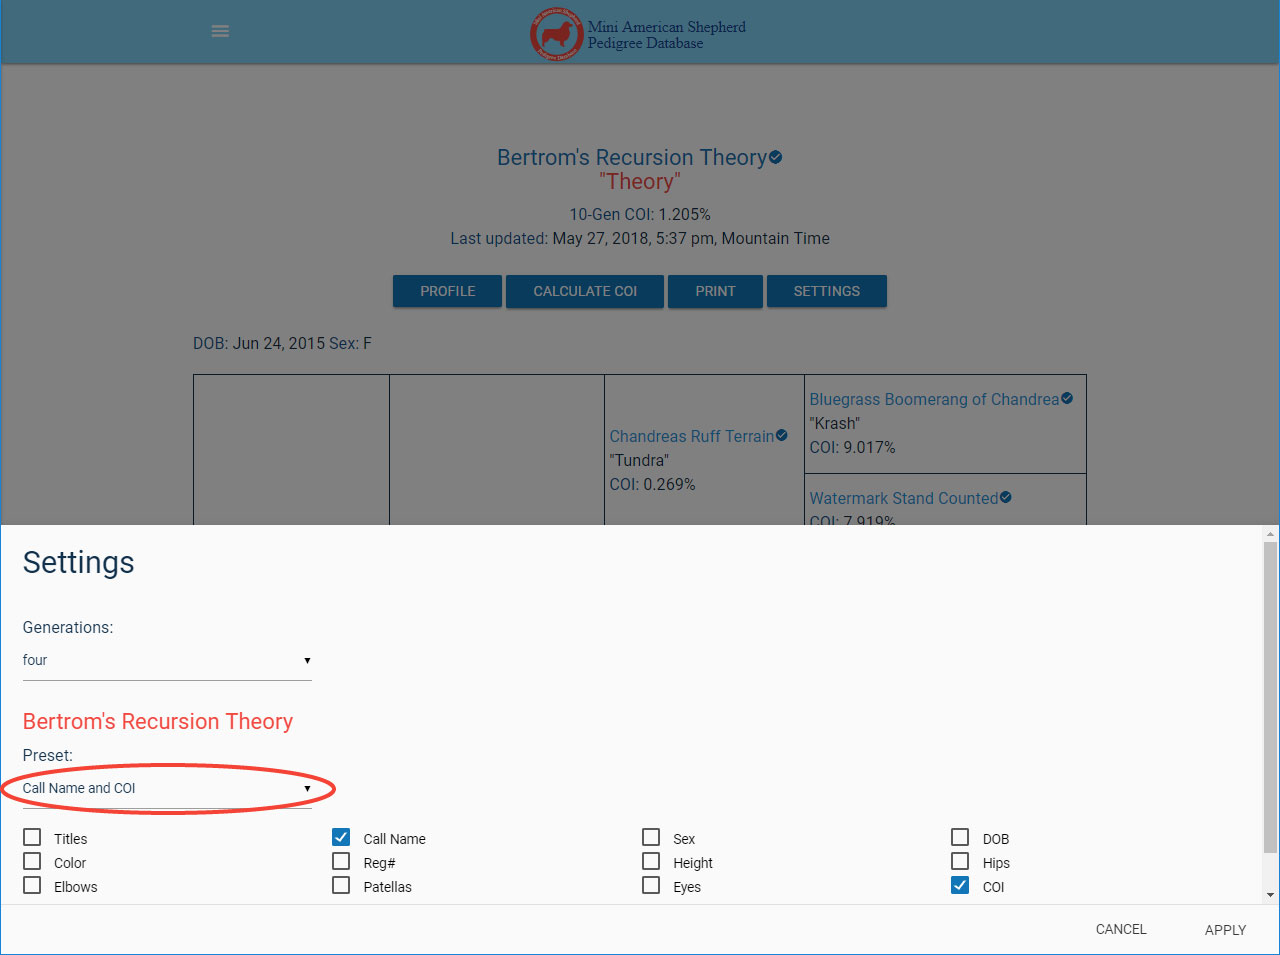
2. There is a dropdown of presets in the settings modal. Click on it.
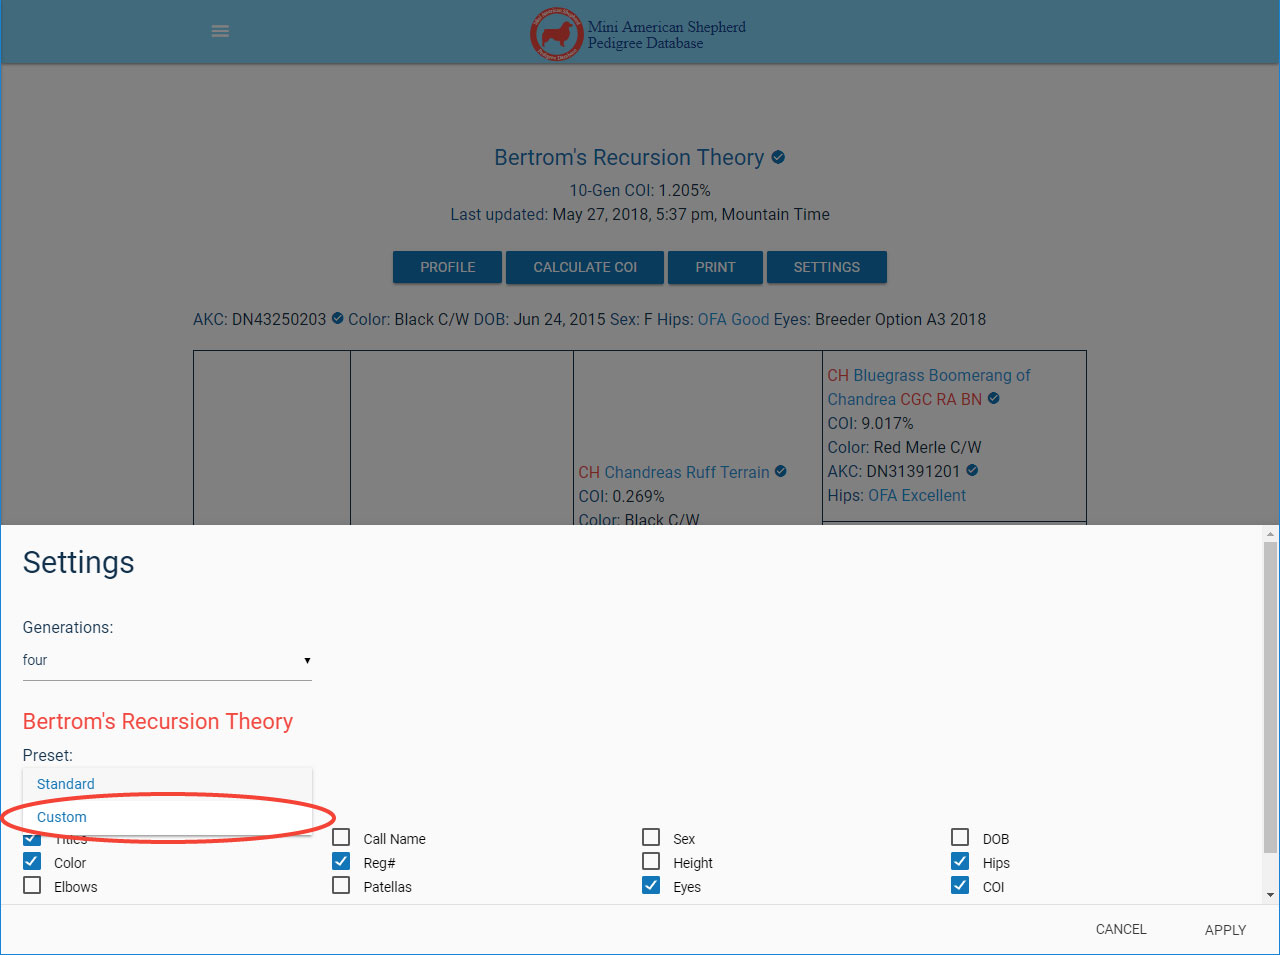
3. Click on "Custom".
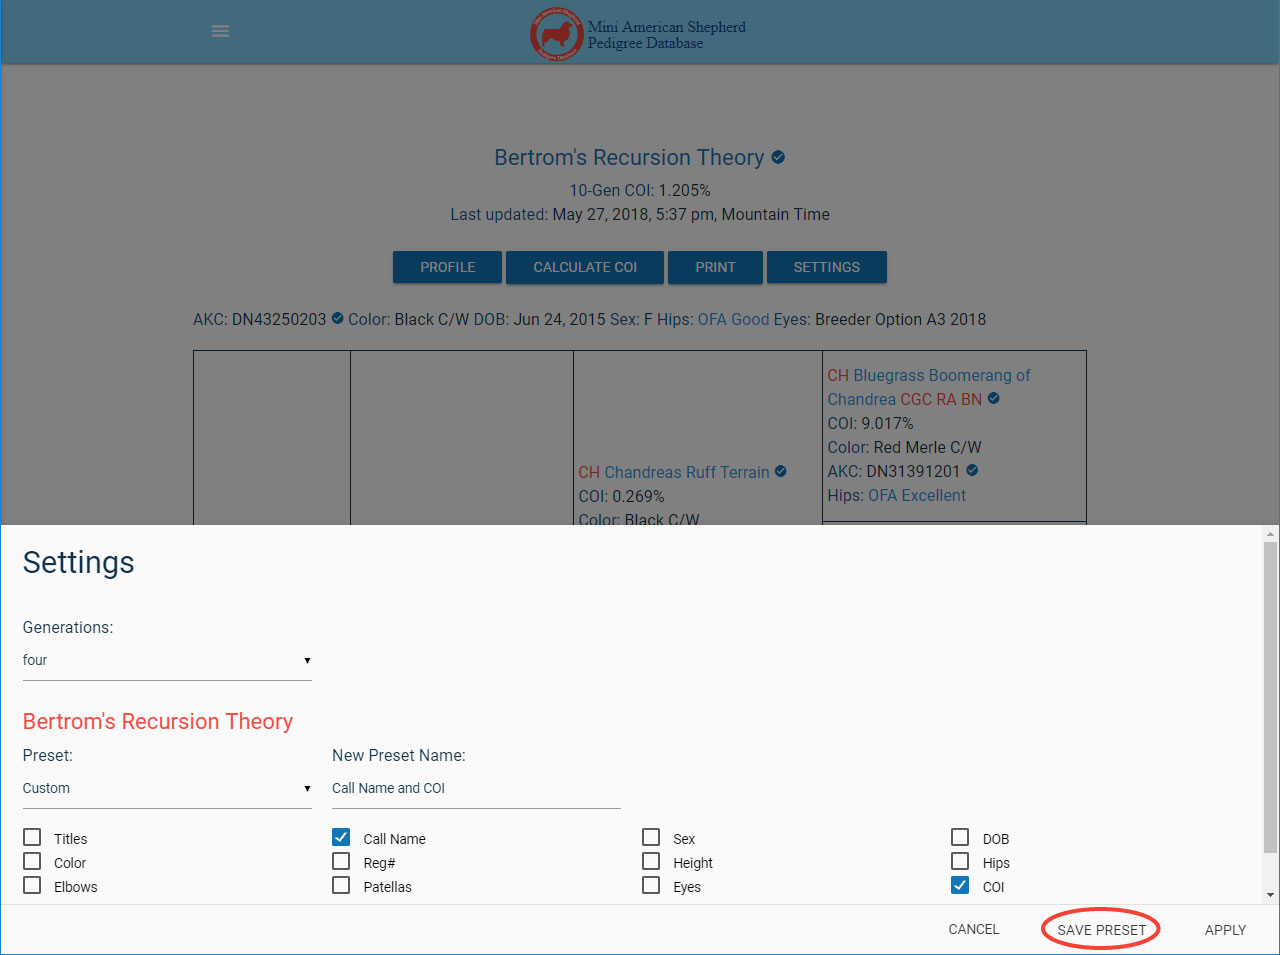
4. Once you click on one of the options for information to display, if you have fewer than three presets saved, a text box will show up for you to put the unique name of your new preset, should you wish to save it.

5. Once you've made your selections and named your preset, click "SAVE PRESET" to save and apply your new preset. If you click "APPLY", you will not save your preset, but your settings will be applied to the pedigree.
6. Your new preset has been applied. A quick look back in the settings modal shows that it has also been saved.